Gaming Chair Clipart Bundle: Practical Workflow Integration for Creators and Entrepreneurs
Digital clipart often sits at the periphery of a project—an afterthought added when the layout is almost complete. The Gaming Chair Clipart Bundle changes that dynamic by offering purpose-built assets that can be integrated early in the design process, shaping the direction of your product line before you commit to final layouts. Whether you produce print-on-demand merchandise, manage a small branding studio, or sell digital templates, having a focused set of high-resolution gaming chair graphics at your disposal reduces the friction between concept and delivery.
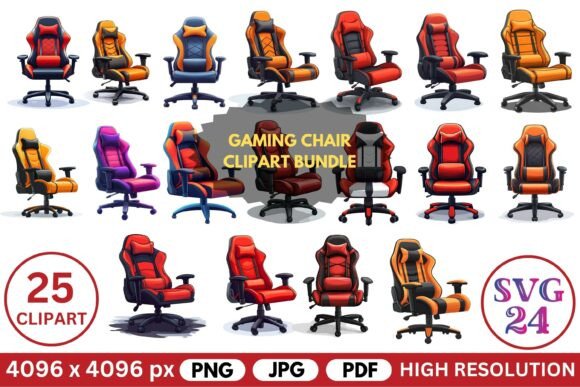
This bundle contains 25 PNG files with transparent backgrounds, 25 JPG files, and a PDF reference sheet—all at 4096 x 4096 pixels. The resolution alone means you can scale the designs for large-format posters, clothing panels, or detailed sublimation prints without worrying about pixelation. But resolution is just one variable. What makes this bundle valuable is how it fits into a repeatable production workflow, saving you time on sourcing, formatting, and testing assets across different product types.
What the Gaming Chair Clipart Bundle Actually Contains
Before integrating any asset into a workflow, you need to know exactly what you are working with. The bundle includes 25 distinct gaming chair designs, each delivered in both PNG and JPG formats. The PNG files have transparent backgrounds, which is critical for layering onto apparel mockups, social media graphics, or composite images where the chair needs to sit naturally within a scene. The JPG versions provide a flattened alternative for platforms that do not support transparency, or for quick previews during client reviews.
The accompanying PDF file serves as a thumbnail reference sheet. This is a practical tool for planning: you can print it, mark selections, or share it with a team member or client before you open any design software. It reduces the back-and-forth of “show me which one you mean” and keeps your project moving forward.
Each file arrives at 4096 x 4096 pixels, a resolution that covers most commercial use cases without requiring upscaling. For sublimation printing, this size directly maps to common print areas on hoodies, pillows, and bags. For digital use, you can downsample without losing sharpness. The files are not editable in the sense that you cannot open a layered source file—you receive ready-to-use raster images that you can crop, resize, and combine with other elements as needed.
Where the Bundle Fits in Your Creative Workflow
Experienced creators treat asset libraries as components in a larger system. The Gaming Chair Clipart Bundle enters your workflow at the asset preparation stage, after you have defined the product type and target audience but before you commit to final production files. Instead of searching for individual chair illustrations on stock sites, negotiating licenses, or waiting for custom artwork, you have a consistent set of designs that share a visual style. This consistency matters when you are creating a cohesive product line—think of a set of mouse pads, phone cases, and t-shirts that all feature complementary chair graphics. Customers recognize that visual language as belonging to your brand.
For print-on-demand sellers, speed matters. You need to upload fresh designs frequently to stay visible on platforms like Redbubble, Printful, or Amazon Merch. Having a bundle of 25 ready-to-use gaming chair graphics lets you batch-produce product variants. In one session, you can prepare the PNG files for t-shirts, hoodies, and stickers across multiple colors. The transparent background eliminates the time you would otherwise spend removing backgrounds or cleaning up edges. Each graphic drops cleanly onto your mockup template.
Before the Project: Planning and Preparation
When you are scoping a new product release, the Gaming Chair Clipart Bundle helps you validate concepts before investing in custom illustration. If you are testing a gaming-themed apparel line, you can drop a chair graphic onto a t-shirt mockup, run A/B tests with different designs on social media, and gather feedback without commissioning original art. This approach reduces the risk of producing inventory that does not sell.
You might also use the bundle during the product research phase. Create quick mockups of pillows, mugs, and journal covers using the JPG files, then compare how the same graphic translates across formats. Some designs that look strong on a phone screen may feel too detailed for a small coaster. The reference sheet helps you flag these issues early.
During Production: Implementation and Assembly
The real efficiency gain comes during the production phase. Once you have selected the designs for your product line, you can set up a batch processing pipeline. If you use design software like Photoshop, Canva, or Affinity, you can import the PNG files, apply your brand colors or overlays, and export the final print files in one workflow. The uniform resolution means you do not need to adjust scaling settings per file—you can use the same dimension presets across all 25 designs.
For those using sublimation printers, the high resolution directly supports full-color transfers onto polyester-coated surfaces. The game chair cliparts feature defined lines and distinct silhouettes, which typically transfer cleanly even on fabrics with slight stretch. If you produce items like mouse pads or coasters, the graphic remains crisp at the standard 8x8 or 10x10 inch print area.
For digital content creators, the same bundle serves social media templates, YouTube thumbnails, and promotional banners. A gaming chair graphic placed in the background of a thumbnail adds visual context without requiring a 3D render or a photo shoot. The transparent PNG allows you to composite the chair with other elements like text overlays, gradient backgrounds, or character illustrations.
Integration with Other Tools and Resources
No clipart bundle exists in isolation. The Gaming Chair Clipart Bundle interacts with your other tools in predictable ways that can make your overall process smoother.
Design software compatibility: The PNG and JPG files work in any program that accepts raster images—Photoshop, Illustrator (as placed images), Canva, Procreate, GIMP, Inkscape, and web-based editors. If you use Canva for quick mockups, drag the transparent PNG directly onto your canvas. If you prefer vector workflows, you can trace the bitmap in Illustrator to convert the chair into a scalable path, though you may lose some of the original texture or shading.
Print-on-demand platforms: When you upload to Printful or Redbubble, the PNG files with transparent backgrounds reduce the need for manual cleanup. The platform’s preview tool will render the chair design on a blank product without a white box around it, giving you a more accurate product image. For platforms that require JPEG, the included JPG files provide a clean white background that works well for light-colored products.
Sublimation printing: For heat transfer, the 4096 x 4096 pixel resolution gives you headroom to print at 300 DPI on substrates up to approximately 13.6 x 13.6 inches. If you produce smaller items like phone cases or pop-sockets, you can scale down the image without quality loss. The bold linework in the clipart designs helps the transfer survive the heat press without blurring, especially on polyester-blend fabrics.
Practical Implementation Tips
How you organize and process these files determines how much time they save you over the long term. Here are concrete actions that improve usability and consistency.
- Create a master folder structure: Keep the original ZIP file archived. Extract the contents into a working folder with subdirectories labeled “PNG,” “JPG,” and “Reference.” If you work across multiple projects, add a parent folder named by year or by product line so you can locate assets later.
- Rename files systematically: The delivered filenames may be generic. Before you start your first project, rename the files with descriptive labels like “gaming-chair-01-red-accent.png” so you can locate specific styles without opening each one. This is especially helpful if you collaborate with a team.
- Build a mockup template library: Create blank project files for each product you produce—t-shirt, hoodie, mug, sticker, phone case. Insert a placeholder layer where the clipart will go. When you want to test a new design, you can drag in a chair graphic, and the template handles the sizing and positioning automatically. This reduces setup time to under a minute per product.
- Batch resize for small formats: For products like stickers or pop-sockets, you do not need the full 4096 px resolution. Batch-resize the entire set to 1500 x 1500 px or 2000 x 2000 px using a tool like IrfanView, Photoshop actions, or ImageMagick. Smaller files open faster in mockup software and reduce export times.
- Consider color consistency: The clipart files come with their own color palette. If you need them to match your brand colors exactly, you can apply a color overlay in your design software. In Photoshop, use the “Color Overlay” layer style; in Canva, adjust the hue or apply a filter. This is faster than editing the original raster file.
Usability Observations and Long-Term Considerations
Over the course of a few production cycles, you will develop preferences about which designs work best on which substrates. Some gaming chair graphics are more detailed, with many small elements like armrests, casters, and back support contours. These look excellent on larger items like hoodies or posters where the detail is visible. For smaller items like stickers or mugs, choose the designs with bolder silhouettes and fewer fine lines—they will read more clearly at a reduced size.
Because the files are raster, you cannot edit individual elements within the chair design. If you need to change the color of only the seat cushion or remove the armrest, you would need to do that manually with selection tools in your image editor. For most users, the designs are used as-is, and the bundling of 25 variations gives you enough options that you can simply pick a different chair if a specific angle or color does not suit your layout.
Over the long term, the value of this bundle increases as you accumulate mockups and templates that are already sized and styled for these graphics. After two or three product launches, you will have a repeatable process where selecting a chair design, placing it into a template, and exporting the final file takes minutes rather than hours. The upfront investment in organizing the library pays for itself when you respond quickly to seasonal trends or customer requests.
When Not to Use This Bundle
No asset is universal. If your project requires vector scalability for billboard-size output or if you need to edit individual components of the chair (like adjusting the angle of the backrest), then a vector file format such as AI or SVG would be more appropriate. Similarly, if your brand identity demands custom-drawn chairs that reflect a unique style, then stock clipart—even high-quality bundles—may not fit. The Gaming Chair Clipart Bundle is designed for speed and consistency, not for open-ended creative editing.
For anyone producing gaming-themed merchandise, social media assets, or sublimation products at scale, this bundle provides a practical shortcut. It removes the search time, the licensing complexity, and the resolution concerns that slow down production. When integrated into a well-organized workflow, it becomes a repeatable asset that you can rely on across multiple projects without starting from scratch each time.
Final Workflow Summary
Effective use of the Gaming Chair Clipart Bundle comes down to preparation and repetition. Unzip the files, organize them by format, rename them for searchability, and build product-specific templates. Then, when a new project begins, you can skip the sourcing phase and move directly to layout and testing. The consistency of 25 coordinated designs means your product line has a unified visual identity without requiring you to commission a full illustration set.
This bundle fits before the creative work (planning and mockups), during production (batch exports and sublimation transfers), and after launch (iterating on best-selling designs using the same asset library). It is a tool for execution, not decoration. And in a practical workflow, that is exactly where it belongs.